In previous post: Handle file upload with MinIO and nodejs. I show you how to use MinIO with nodejs. In this blog, we’ll find out how to host our own Minio service on our Ubuntu server. In this post we just install single node single drive (SNSD) version of MinIO cause it simple and easy to setup but still satisfy our basic needs.
1. Somethings to know
- MInIO provide 2 services: one is a admin dashboard which you can access to manage your buckets, objects
- Another is api service: which use to upload file, get file, get pre-signed url,…
- In this post i use linux platform more specifics is ubuntu distro so for another platform you can read in the offiical docs: https://min.io/docs/minio/linux/operations/installation.html
2. Install MinIO package
wget https://dl.min.io/server/minio/release/linux-amd64/archive/minio_20230907020502.0.0_amd64.deb -O minio.deb

sudo dpkg -i minio.deb
3. Setup for MinIO server
- You can see the defaut env for MinIO at:
/usr/lib/systemd/system/minio.service/
[Unit]
Description=MinIO
Documentation=https://min.io/docs/minio/linux/index.html
Wants=network-online.target
After=network-online.target
AssertFileIsExecutable=/usr/local/bin/minio

[Service]
WorkingDirectory=/usr/local

User=minio-user
Group=minio-user
ProtectProc=invisible

EnvironmentFile=-/etc/default/minio
ExecStartPre=/bin/bash -c "if [ -z \"${MINIO_VOLUMES}\" ]; then echo \"Variable MINIO_VOLUMES not set in /etc/default/minio\"; exit 1; fi"
ExecStart=/usr/local/bin/minio server $MINIO_OPTS $MINIO_VOLUMES

# MinIO RELEASE.2023-05-04T21-44-30Z adds support for Type=notify (https://www.freedesktop.org/software/systemd/man/systemd.service.html#Type=)
# This may improve systemctl setups where other services use `After=minio.server`
# Uncomment the line to enable the functionality
# Type=notify

# Let systemd restart this service always
Restart=always

# Specifies the maximum file descriptor number that can be opened by this process
LimitNOFILE=65536

# Specifies the maximum number of threads this process can create
TasksMax=infinity

# Disable timeout logic and wait until process is stopped
TimeoutStopSec=infinity
SendSIGKILL=no

[Install]
WantedBy=multi-user.target

# Built for ${project.name}-${project.version} (${project.name})- As you can see in env file we need to have a user group and a defaut directory to save our objects. So, let create it
groupadd -r minio-user

useradd -M -r -g minio-user minio-user

sudo mkdir /mnt/data
sudo chown minio-user:minio-user /mnt/data- These commands bellow create a user group named minio-user then create an user named minio-user then add to the user group. Then weh create a directory to store our files at /mnt/data and grant all access to user: minio-user
- Next step, we will config mino env file to make it using the /mnt/data. Open the /etc/default/minio with your text editor here im using vim, and paste the following configs:
vim /etc/default/minioMINIO_VOLUMES="/mnt/data"
MINIO_OPTS="--console-address :9001"
MINIO_ROOT_USER=minioadmin
MINIO_ROOT_PASSWORD=minioadmin- First line specific the data directory, second like to tell minio to start admin dashboard at port 9001 if you dont do it minio will random dasboard port each time we restart it. 2 last lines is for username and password of admin dashboard
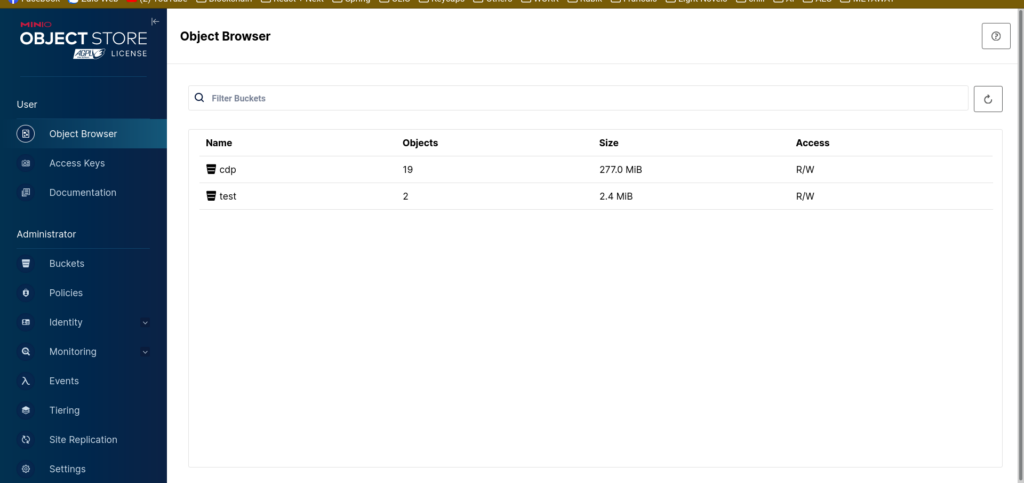
- At this point type sudo systemctl restart minio.service then go to localhost:9001 to login with username and password you provided in config file to see the minio dashboard
- The api service is running at localhost:9000
- Ok that;s how you host your own MinIO simple right ?
4. Config Nginx for MinIO
- But all your services is localhost without SSL. The dashboard doesn’t need to connect via SSL but because we need to use the api endpoint in Frontend eg: Put file to pre-signed url (ofcause your fe pages using HTTPS protocol). One solution is that you can use free cert cert bot https://certbot.eff.org/ or certgen https://github.com/minio/certgen then add the cert dir to MINIO_OPTS like this MINIO_OPTS=”–certs-dir /home/.minio/certs –console-address :9001″. This methods provides you a free cert file to making your host server can connect using https but these certs are not authed by CA (the Certificate Authority) so the browser still warn you when you visit the sites using these SSL certificates.
- But if you follow my blogs, you should know that i prefer use Cloudflare sites to proxy my domain to my host ip. Of cause the SSL provides by Cloudflares is authed by CA so browser won’t complain when we visit the site. To do that i need to to reversed proxy theâpi service at port 9000 to port 80 so the cloudflare pages can work on it using Nginx (also my favorite web server).
- So let’s Install nginx
sudo apt install nginx- Create a file for our nginx server: sudo vim /etc/nginx/sites-available/minio
server {
    listen 80;
    server_name your_domain;
    ignore_invalid_headers off;
    client_max_body_size 0;
    proxy_buffering off;
    proxy_request_buffering off;
    proxy_connect_timeout 300;
    # Default is HTTP/1, keepalive is only enabled in HTTP/1.1
    proxy_http_version 1.1;
    proxy_set_header Connection "";
    chunked_transfer_encoding off;
    proxy_set_header Host $http_host;
    proxy_set_header X-Real-IP $remote_addr;
    proxy_set_header X-Forwarded-For $proxy_add_x_forwarded_for;
    proxy_set_header X-Forwarded-Proto $scheme;
    location / {
        proxy_pass http://tsmc.info:9000;
    }

}
- These proxy_set_header key-values are necessary so don’t remove it
- Then symbol link this file to sites-enabled: sudo ln -s /etc/nginx/sites-available/minio /etc/nginx/sites-enabled/
- Restart our Nginx: sudo systemctl reload nginx
- Finally, set your domain in config: vim /etc/default/minio
MINIO_SERVER_URL=https://your_domain
- Ok that’s it now use the https://your_domain as MiniO API endpoint (port 80 not 9000 cause we proxy it)
Conclusion
As you see, it’s not hard to host your own MinIO or your S3 object storage right ?. Hope you like this. This’s the codding cat again. See you next time
__CodingCat 2023__