We can chose microk8s as your solution for a private cloud. But a better solution when you have a lot of servers is Harvester HCI. For microk8s we’ve learned how to install and use it from the previous blog. But in this blog, we”ll explore new powerful tool. Let’s see what it can do.
Table contents
- Part 1: My first time deploy a web to a aws cloud service
- Part 2: Docker and containerization
- Part 3: K8s and the new world of container orchestration
- Part 4: Deploy your express application to k8s
- Part 5: Networking with K8s is f***ing hard
- Part 6: From the cloud to ground: Physical server setup for a private cloud
- Part 7: From the cloud to ground: Install Ubuntu Server and Microk8s
- Part 8: From the cloud to ground: Harvester HCI for real world projects
- Part 9: From the cloud to ground: Private images registry for our private cloud
- Part 10: From the cloud to ground: Accept outside world traffics via Cloudflare tunnel
- Part 11: From the cloud to ground: CI/CD with git hub runners
- Part 12: Monitoring and debugging with Open Observe and lens
What is Harvester
Well first it’s an OS and it’s open source. You can imagine harvester is a k8s cluster but instead of managing container it managing VMs. Harvester it’s self have a k8s cluster named rancher when we install the OS
Harvester is an open-source hyper-converged infrastructure (HCI) solution built on Kubernetes. It integrates compute, storage, and network virtualization into a single platform, simplifying the deployment and management of virtual machines alongside container workloads. It’s developed by SUSE and is designed to offer an alternative to traditional virtualization and HCI solutions like VMware vSphere. Harvester is part of the larger ecosystem of cloud-native projects and leverages technologies such as KubeVirt (for VM management) and Longhorn (for persistent storage). (this from chat gpt :))) )
Ok, So for small numbers of servers and don’t need to create a lot of VM microk8s still is a best choice (my private cloud is using microk8s with single node) but when you have a lot of servers Harvester give you more powerful tools to manage your cluster.
Base on your needs chose the right solution for your private cloud. Harvester is powerful but require more computer resource to work perfectly
Install Harvester HCI
It’s an Os so just install just like any os. First download the iso installation file at: https://github.com/harvester/harvester/releases/. I use v1.2.1 in this blog
Burn this iso file to an usb (use rufus or any software familiar to you). Then turn on your computer and boot to the usb. The grub boot menu wil show up
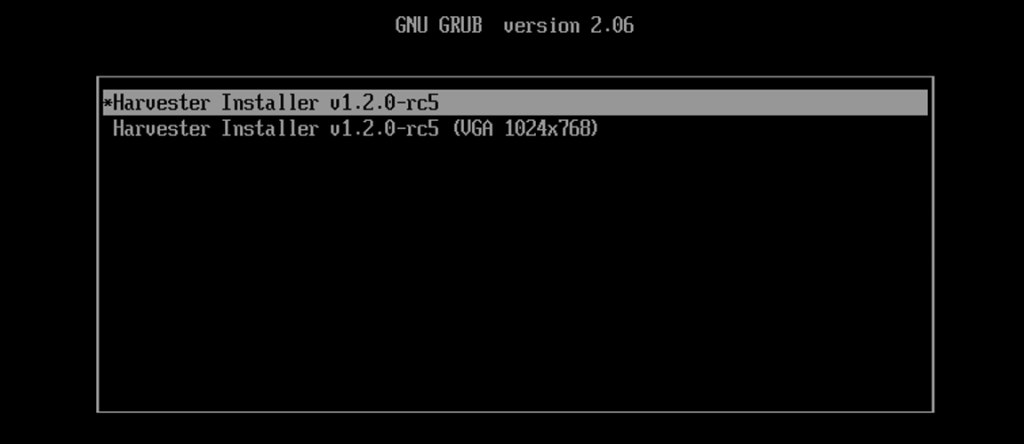
If you are using vga to output to your monitor chose option with VGA if not just chose first option and we go to next step

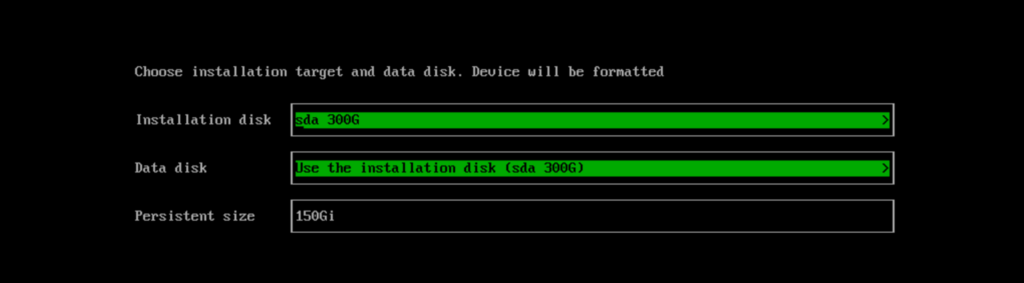
If you want to create new cluster (usually your first server to install harvester) chose create harvester if you have an existing harvester cluster chose join. Now chose the disk to install based on your machine the options maybe different. Use Tab to switch the options. My advice is chose a small disk for installation disk and use your biggest disk for data disk
Enter the hostname this must be unique with other node in cluster

Now for network configuration. Chose management NIC port is the option is mark as up (mean it have a ethernet cable plugged in this port). Then Ipv4 chose to Static IP don’t chose dynamic IP DHCP lilke the picture below

After chose static IP method, The installer will ask you to enter the gateway IP and the static IP of the node you want. For the gateway IP in the previous blog i’ve told you how to get it. It is your internet router ip eg: my router ip is 192.168.10.1. Then enter the static ip that you want to assign to this node. This can be any ip start with 192.168 (because it a local lan ip) and is not used by another device. I usually set the IP address start like router address (eg 192.168.10.x)

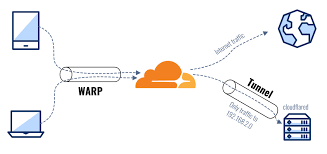
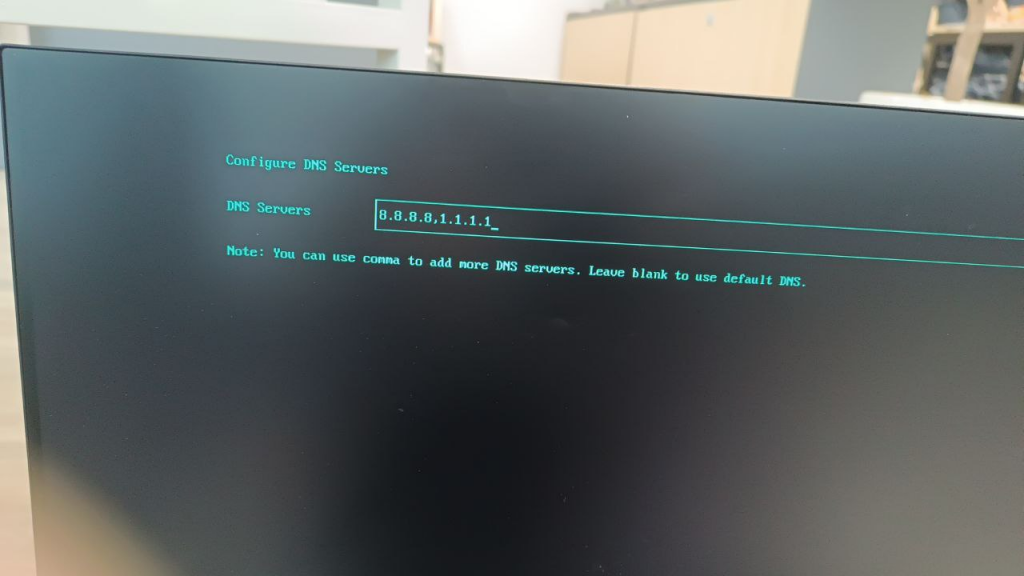
Then you need to set up dns server. Use these 2 DNS 8.8.8.8,1.1.1.1 The 8.8.8.8 is google DNS and 1.1.1.1 is cloudflare DNS beacause we will expose our private cloud via cloudflare
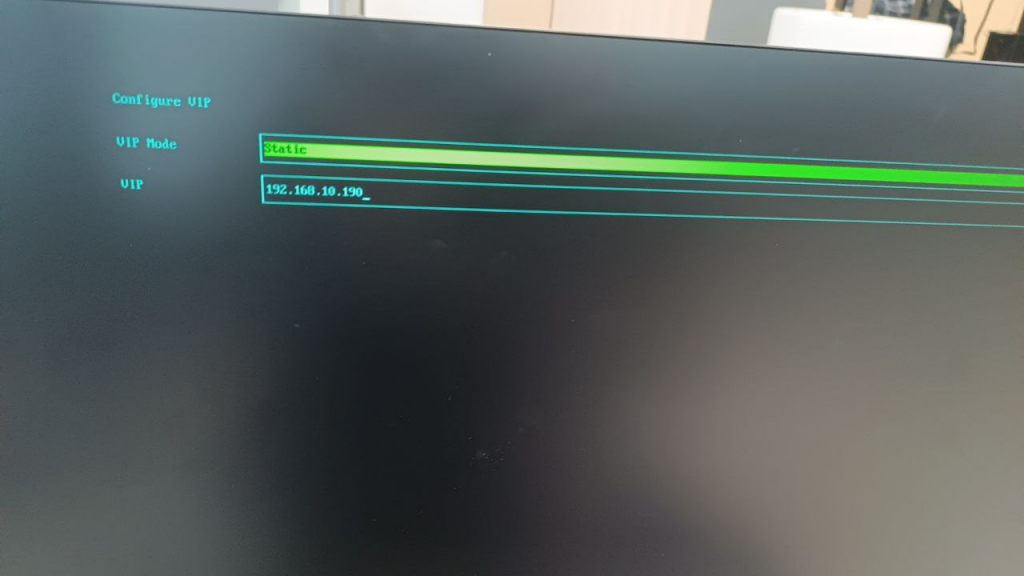
If you chose option that you create new harvester cluster. The installer will ask you to set the VIP (virtual IP address) for all node in cluster. This IP will use for access the k8s api or the harvester management dashboard. Chose VIP mode is static mode and chose an IP for VIP
Now enter your cluster token this token is used for another node to join cluster.

Config NTP Server, just leave it as default

Set the root password for the node. The default user to ssh into is rancher.

Config http proxy, just skip this step

Enter your github public keys url like this https://github.com/lilhuy0405/keys then enter

HTTP URL if you have a domain that point to this static node IP then enter otherwise just leave it blank and go to the next step

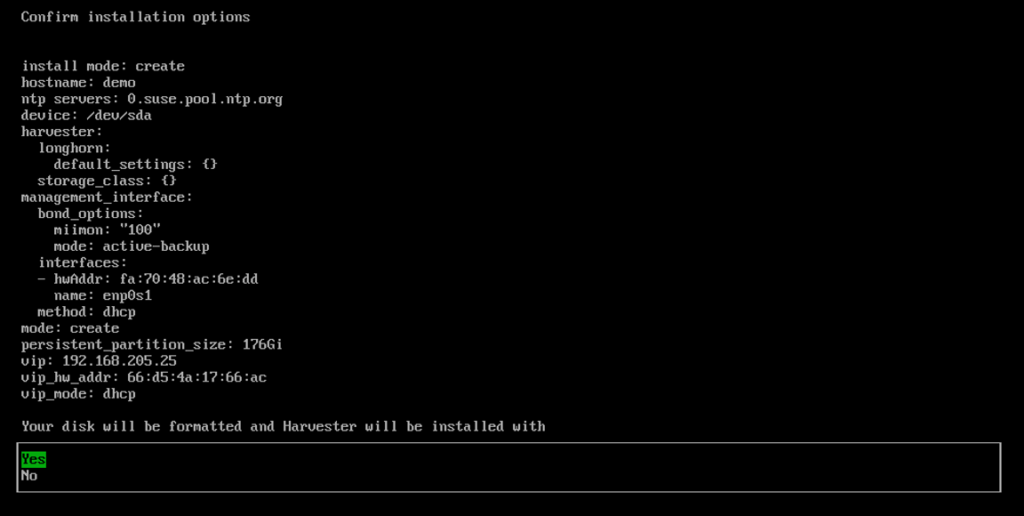
Review your configurations and continue
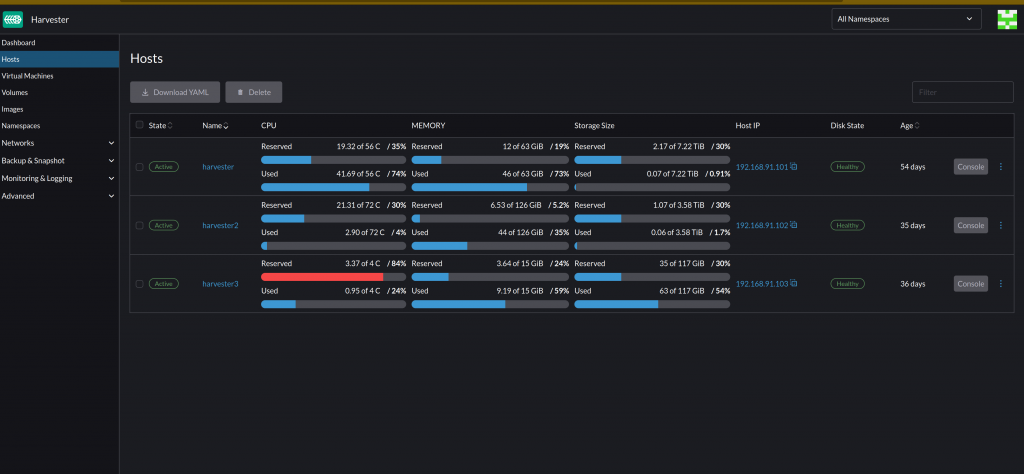
Now sit down and drink a coffee because the installation may take a while. After the installation complete you can see the dashboard here. Use F12 to switch to shell terminal and back.

Now if you open the cluster VIP you can see the harvester dashboard site
Next step ?
It’s not too hard to install harvester right just key remember some config like your gateway your cluster VIP your node IP addresses and password to access and the cluster token. You should note these information some where to use later.
Now you can deploy your services to harvester rancher. To get the kubectl config ssh to any node or ssh to VIP (it will access the first node) then use this command to get the cluster config yaml file
kubectl config view --rawChange localhost to your vip and you’re done. Good luck !
But now your harvester rancher can only pull image from public registry like dockerhub. In next part of this series we’ll see how can we setup private registry for our rancher k8s. Part 9: From the cloud to ground: Private images registry for our private cloud
Thanks for reading see you soon
__CodingCat__