Ok we’re not on the cloud anymore now we go back to ground :))). Hiring a cloud service is nice and quick to shift your application to production but the most important problem is money :v I used to be a aws lover when i have free credit for start up but when my credit ran out. I need to host my own private cloud and move all my services to it. A native cloud on a private cloud is still a good solution for a company. In this blog let’s see what we need to build our own cloud.
Table contents
- Part 1: My first time deploy a web to a aws cloud service
- Part 2: Docker and containerization
- Part 3: K8s and the new world of container orchestration
- Part 4: Deploy your express application to k8s
- Part 5: Networking with K8s is f***ing hard
- Part 6: From the cloud to ground: Physical server setup for a private cloud
- Part 7: From the cloud to ground: Install Ubuntu Server and Microk8s
- Part 8: From the cloud to ground: Harvester HCI for real world projects
- Part 9: From the cloud to ground: Private images registry for our private cloud
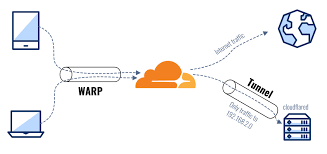
- Part 10: From the cloud to ground: Accept outside world traffics via Cloudflare tunnel
- Part 11: From the cloud to ground: CI/CD with git hub runners
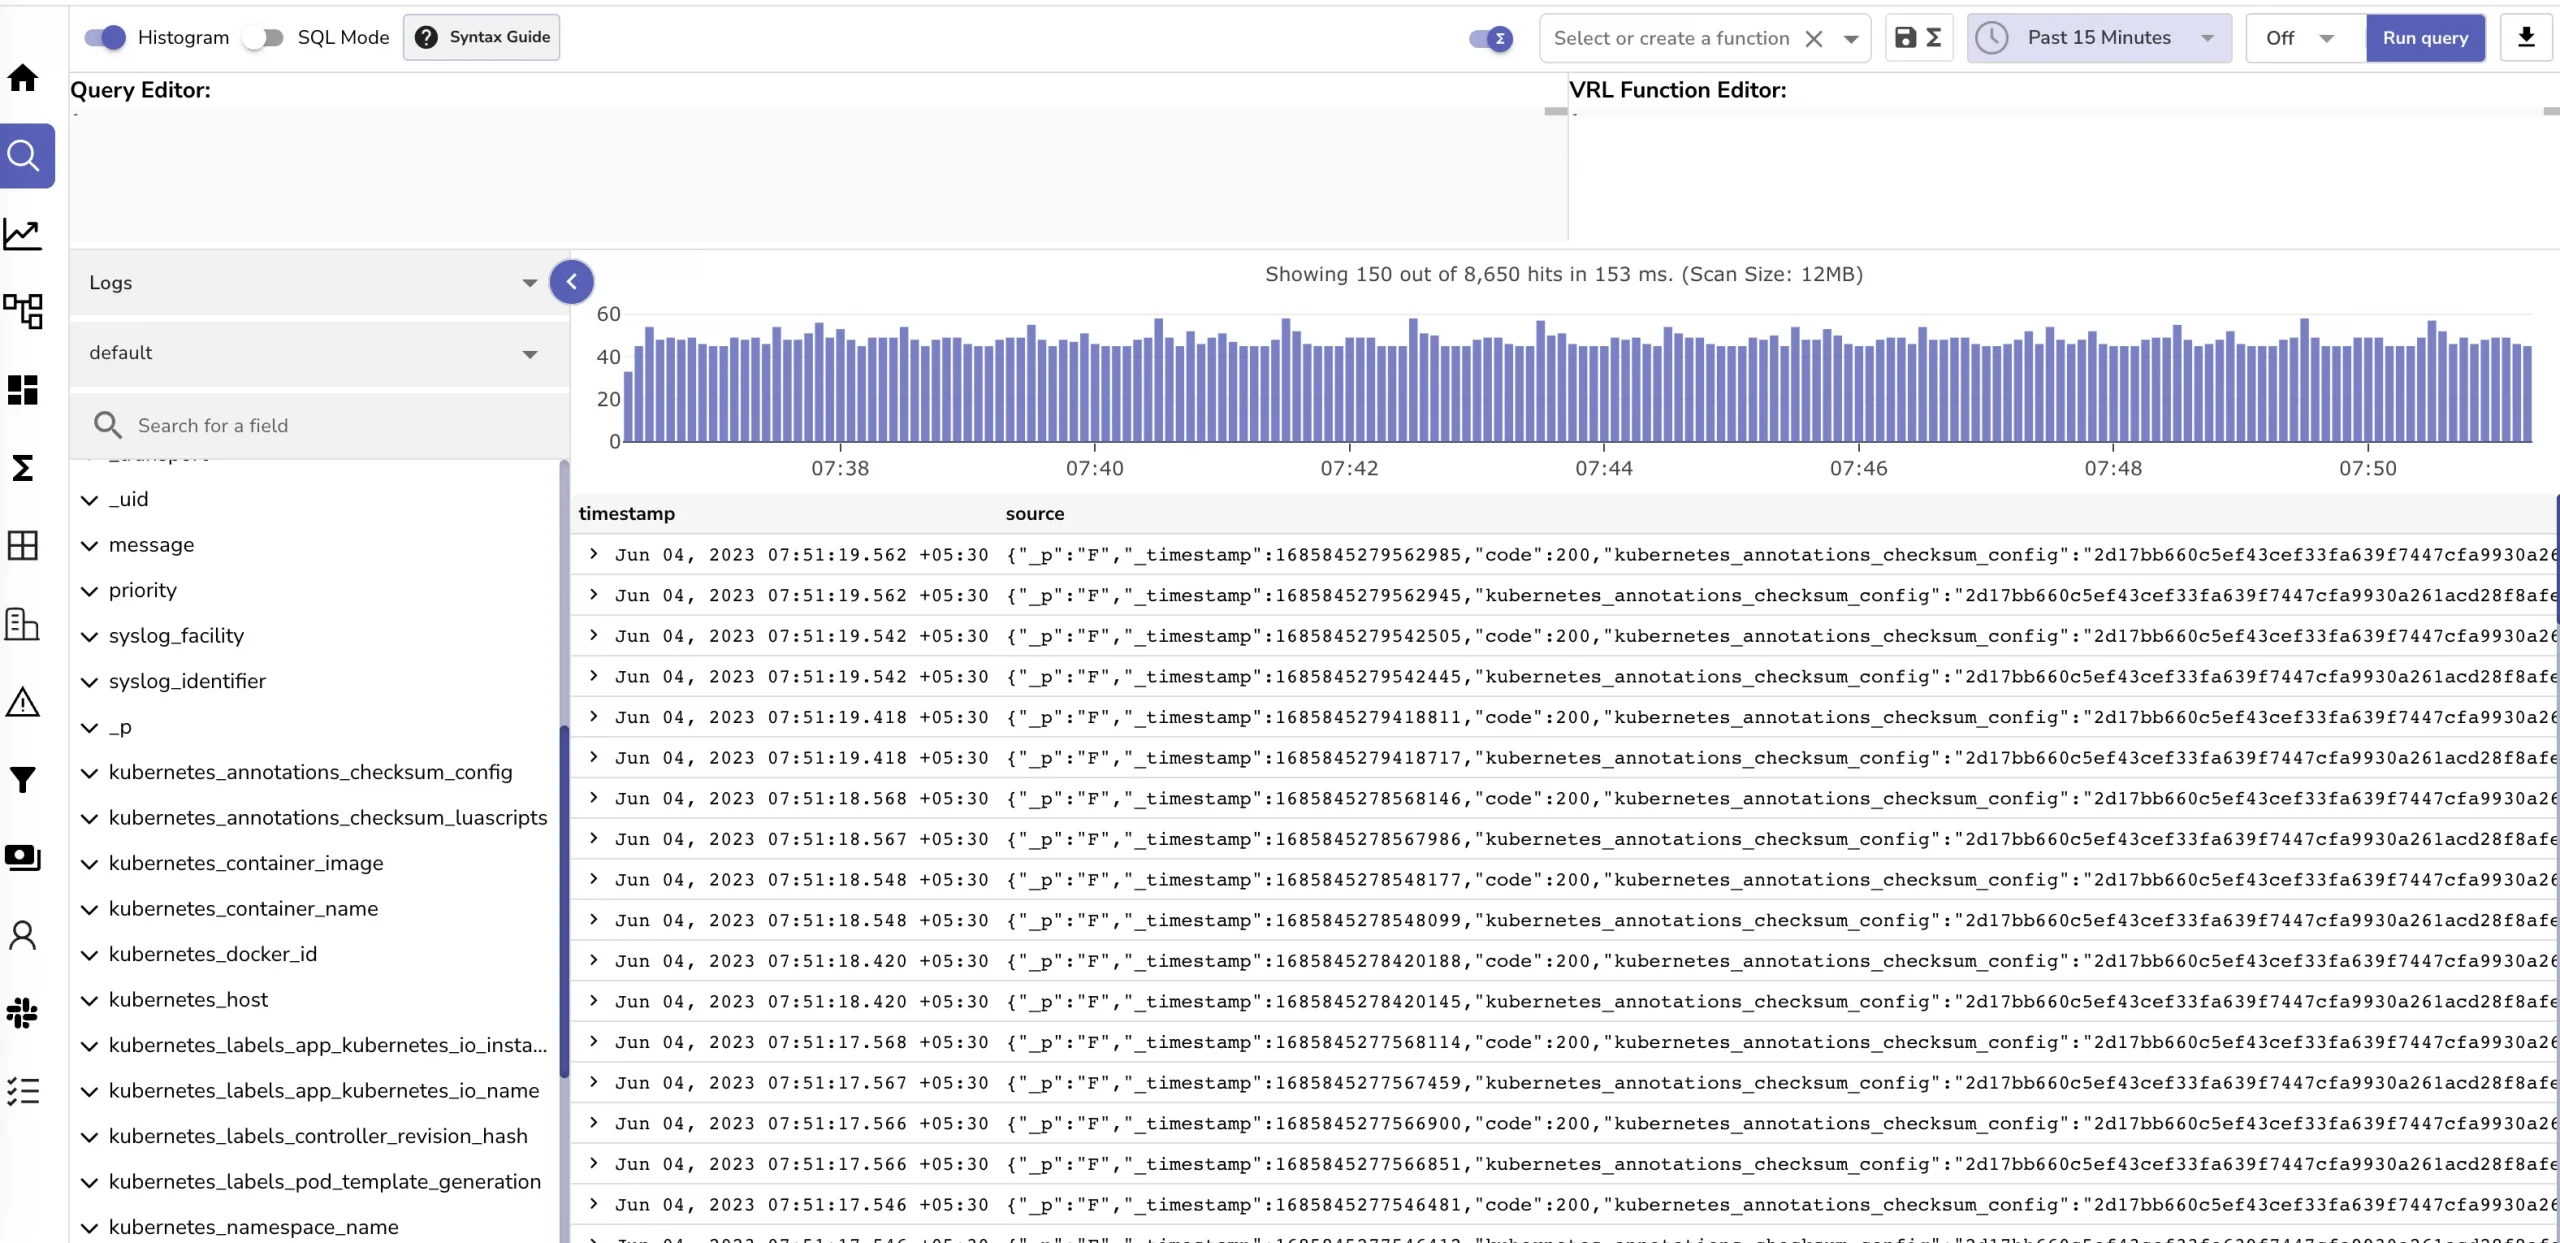
- Part 12: Monitoring and debugging with Open Observe and lens
What is a private cloud
Well for simple when you host everything your self in your bare metal machines. It’s your private cloud not like using other hosted cloud service aws or gcp we can call them as public cloud services. Hosting a cloud can have some benefits: low cost yes because you now own your own cloud no need to pay bill to anyone. Master all underlying infrastructures because you installed them from the scratch. Good learning path for a devops. Always try to built something by your self from zero is good chance to level up your self
But a private cloud has some downsides too. It’s low cost but it need budget at the first time (to buy server of course). It is not stable as a public cloud service for example when you have a power off. Noise issue :v another problem you should consider when you try to host your cloud and the increase of your monthly electricity bill
Physical server setup
Well you may think we need some strong computers to host a cloud services. Well actually you can use your old computers or some workspace computer that have many cpus and rams we just need cpu and rams no need GPUs. (unless you’re hosting AI or ML applications). Even your laptop can turn into your server, an android phone or the raspberry pi. Trying host a cloud with a rasberry pi is super fun i’ll write a blog about this but now im too poor to buy one :)))
I think a computer with 8 core cpus and about 8 to 16gb ram can be a nice server if you have more just use all because for a k8s cluster we can have multiple nodes
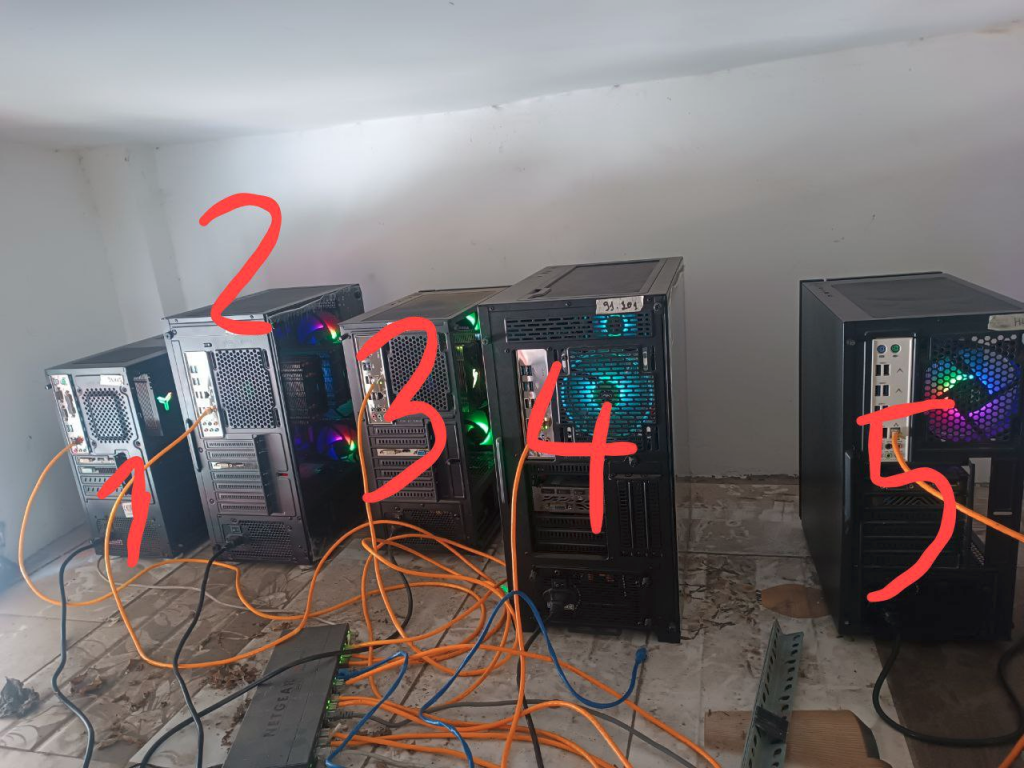
This is my company physical servers. It includes 5 computer these computer are xenon series. The xenon series has many cpus and supports cheap ram. I highly recommend this series to host servers
Now for each server base on the purpose you can install the desire OS (windows, linux or harvester). If you want to host k8s cluster with microk8s just install ubuntu server to all servers or if you want use harvester just install harvester.
To create a microk8s cluster. type this command in a node that you decide it as a master node
microk8s add-nodeAfter that the command will return the function to run in other node to join the k8s cluster. For example;
From the node you wish to join to this cluster, run the following:
microk8s join 192.168.1.230:25000/92b2db237428470dc4fcfc4ebbd9dc81/2c0cb3284b05

Use the '--worker' flag to join a node as a worker not running the control plane, eg:
microk8s join 192.168.1.230:25000/92b2db237428470dc4fcfc4ebbd9dc81/2c0cb3284b05 --worker

If the node you are adding is not reachable through the default interface you can use one of the following:
microk8s join 192.168.1.230:25000/92b2db237428470dc4fcfc4ebbd9dc81/2c0cb3284b05
microk8s join 10.23.209.1:25000/92b2db237428470dc4fcfc4ebbd9dc81/2c0cb3284b05
microk8s join 172.17.0.1:25000/92b2db237428470dc4fcfc4ebbd9dc81/2c0cb3284b05
Read more here: https://microk8s.io/docs/clustering
But here is a important tips: If you have multiple servers (such as my company has) you should use one of them as a centralized database. I means you’ll install all database (eg: mysql, mongo, postgres) to this server and these others server is for your k8s cluster. Then all service in k8s cluster will use database in this one. We should not use database in k8s because it is replicas to all k8s node (take lot of disk). If you just have one server just install microk8s then databases in that server
Network setup
You should have a switch to connect all your physicals server to internet via ethernet. All your servers should connect to the same network so it can communicate to each other easily.
One important thing is that you should know the ip address of your modem or the gateway address of your network. In some router device just turn its back and you can see the gateway ip or if you using linux you can use this command to check the gateway ip:
route -n | grep 'UG[ \t]' | awk '{print $2}'Remember this IP (192.168.x.x) because you need to use it to config a lot of things later
Conclusion
Any devices you have can turn into a server in your private cloud but if you a hosting real applications that have a lot of traffics you should consider to build a strong device with high amount of cpu and ram. Then just start to install OS and start the devops journey. In next blog we’ll discover a strong tool called harvester HCI for company solutions. Part 7: From the cloud to ground: Harvester HCI for real world projects