At this point we have a k8s cluster to deploy any web pages, services as we want. But when ever we update our code we need to rebuild the image then update the deployment container’s image. If we have few services we can do it manually. Things gonna be not fun when we deploy a lot of services. Luckily, we can automate this process with github runners. Which is usually called CI/CD pipline.
Table contents
- Part 1: My first time deploy a web to a aws cloud service
- Part 2: Docker and containerization
- Part 3: K8s and the new world of container orchestration
- Part 4: Deploy your express application to k8s
- Part 5: Networking with K8s is f***ing hard
- Part 6: From the cloud to ground: Physical server setup for a private cloud
- Part 7: From the cloud to ground: Install Ubuntu Server and Microk8s
- Part 8: From the cloud to ground: Harvester HCI for real world projects
- Part 9: From the cloud to ground: Private images registry for our private cloud
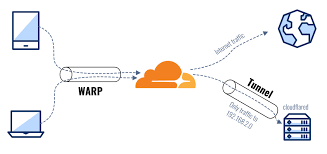
- Part 10: From the cloud to ground: Accept outside world traffics via Cloudflare tunnel
- Part 11: From the cloud to ground: CI/CD with git hub runners
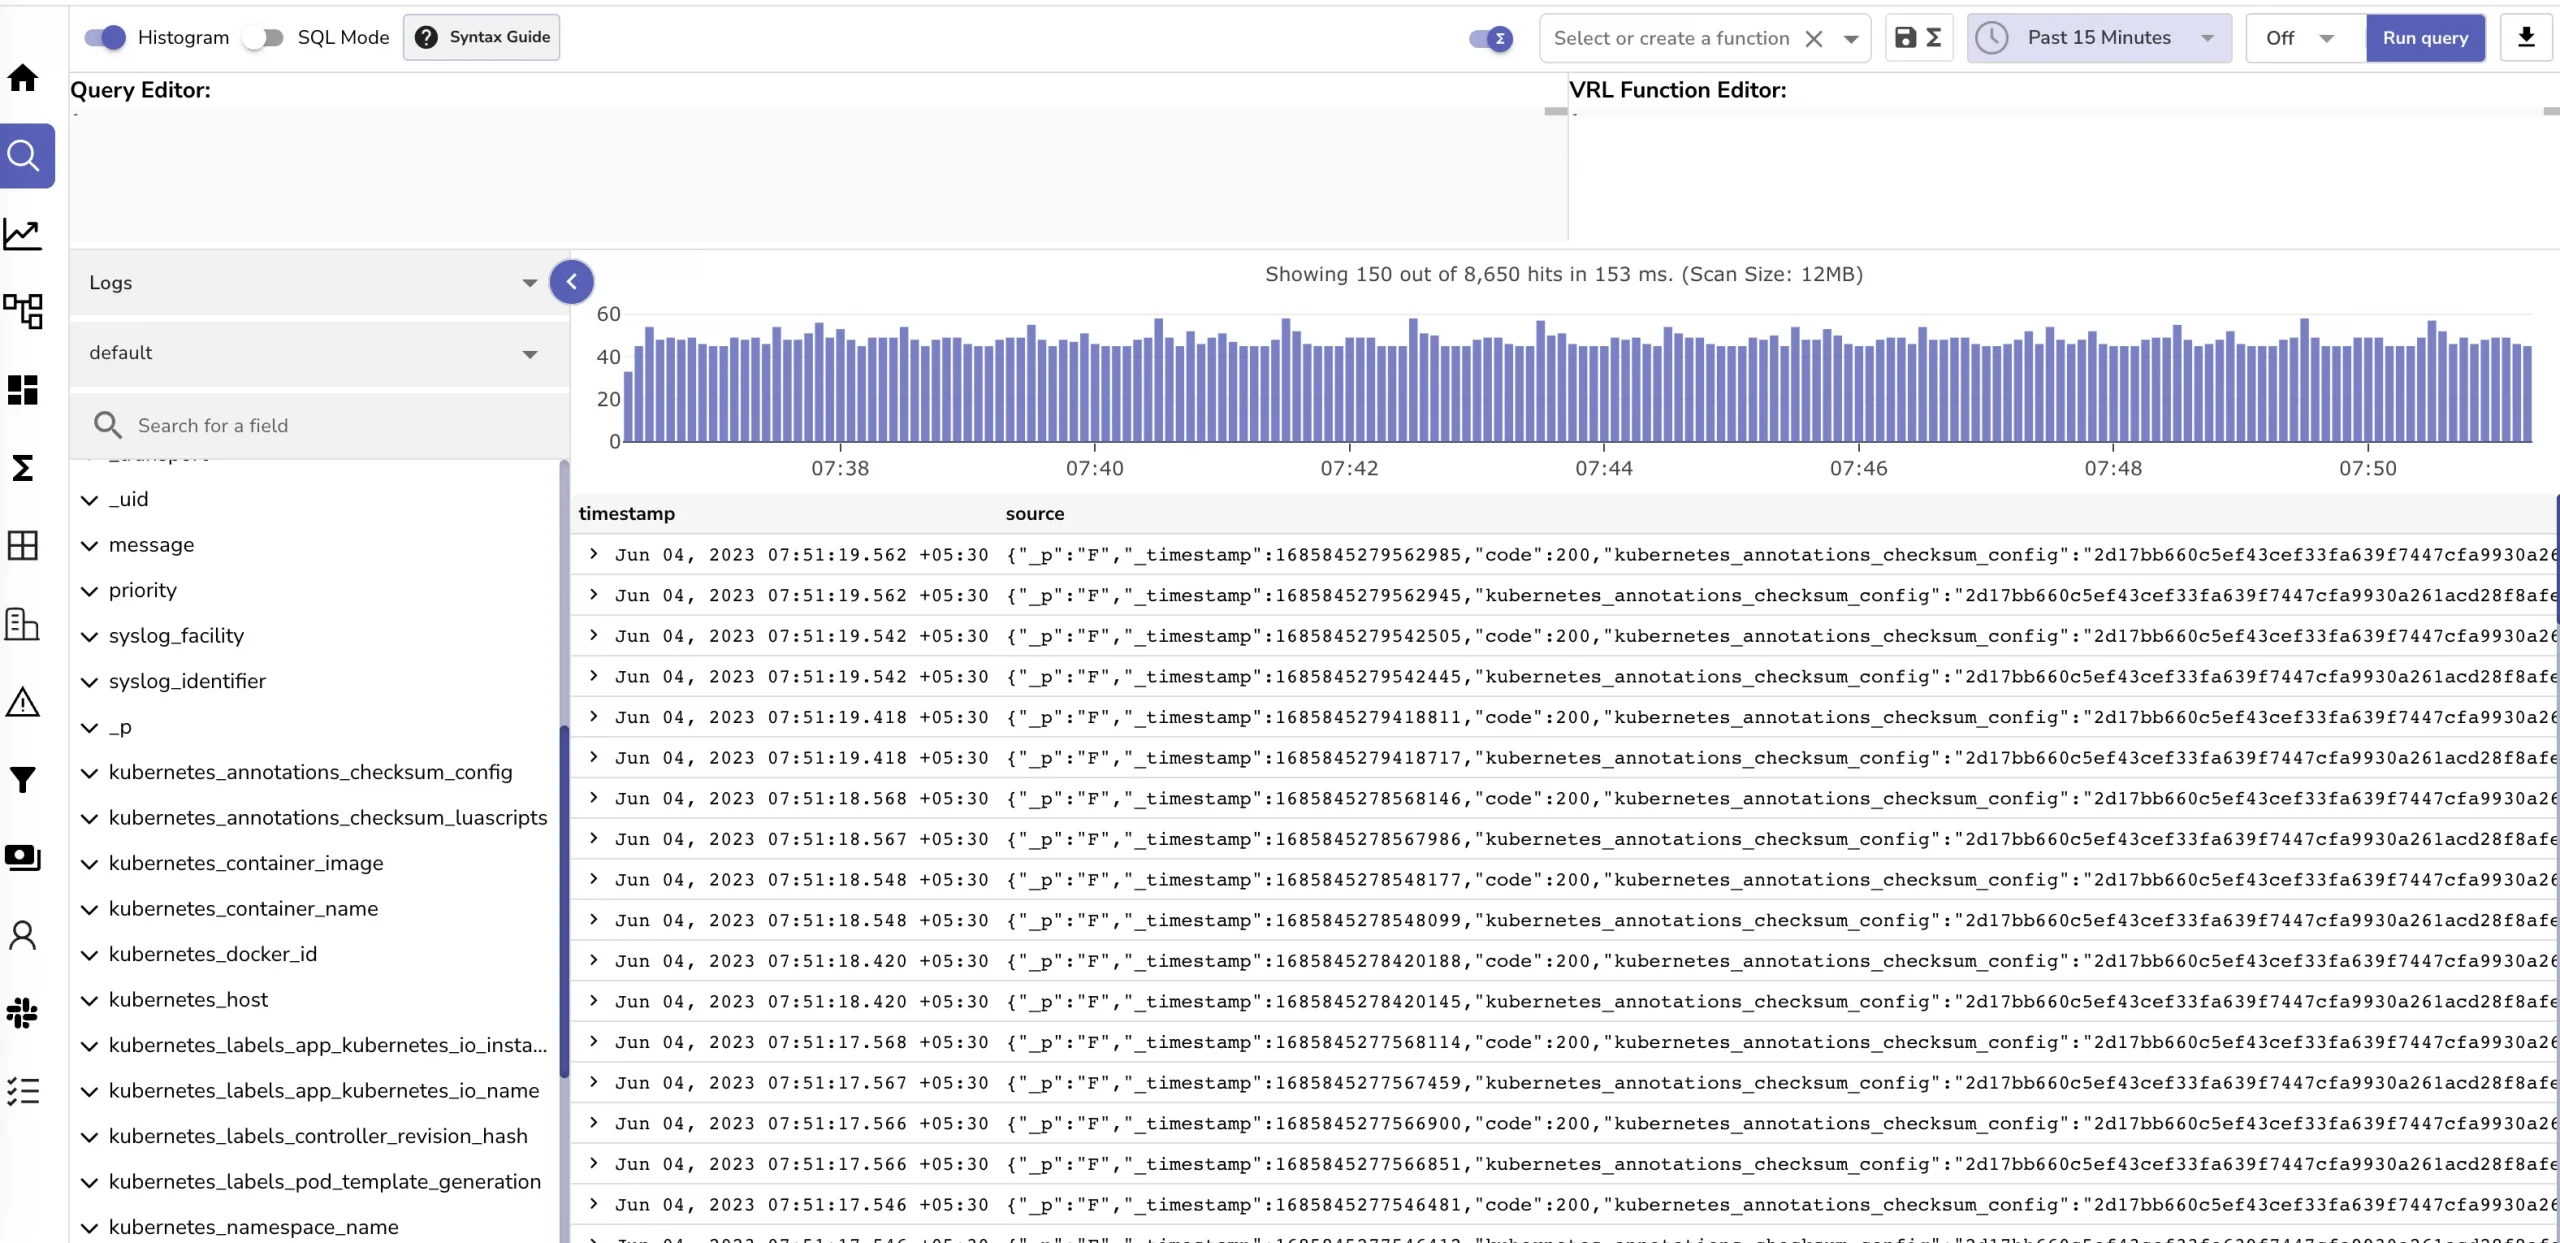
- Part 12: Monitoring and debugging with Open Observe and lens
Github runner ?
A GitHub Runner is a lightweight, configurable application that executes jobs from GitHub Actions workflows within a user’s own environment. This allows developers to automate their build, test, and deployment workflows using their own hardware or virtual environments. GitHub provides hosted runners, but self-hosting runners enables more control over the environment, security, and helps optimize costs for computational resources. Essentially, it extends GitHub’s CI/CD capabilities directly to the environments managed by users.
You can use github hosted runner or you can host a github runner in this blog I’l show you how we can self host a github runner
Self host a github runner
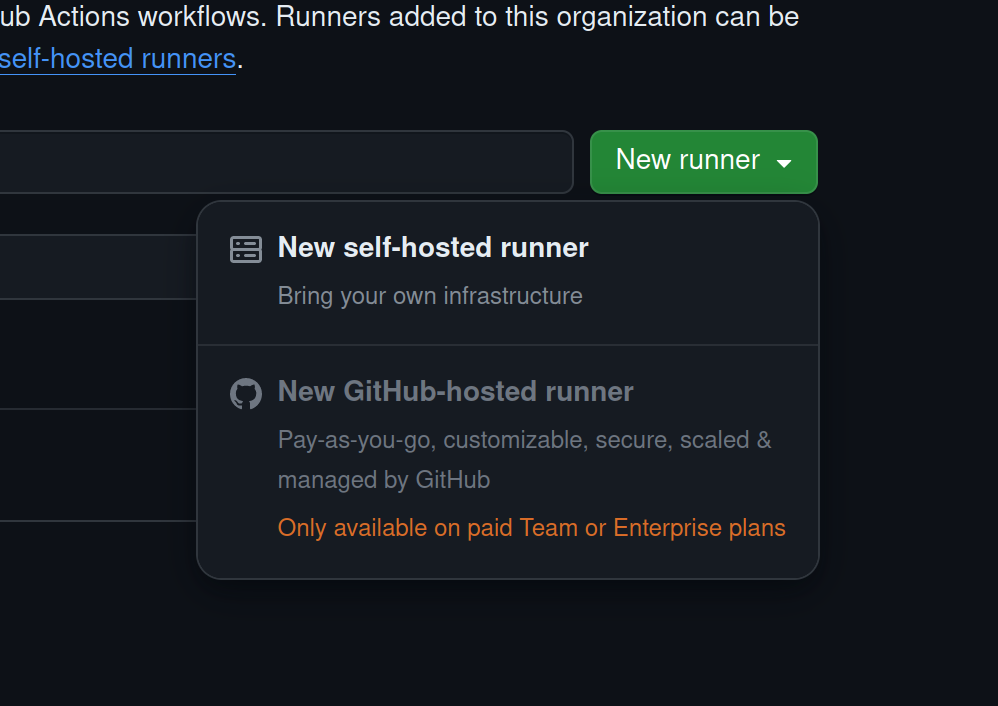
First a self host github runner can match with one repo or multi repos in a github repository. So first you need to create a github repository to store all your projects (which you want to deploy). Then go to the settings tab chose actions > runners options then chose add new self-hosted runner
You need a ubuntu server for next step. You can install to the machine that run a node in microk8s cluster or create a VM using harvester or even hyper V. Then just follow step by step of the instructions that github give to you it look something like this
# Create a folder
$ mkdir actions-runner && cd actions-runner
# Download the latest runner package
$ curl -o actions-runner-linux-x64-2.316.1.tar.gz -L https://github.com/actions/runner/releases/download/v2.316.1/actions-runner-linux-x64-2.316.1.tar.gz
# Optional: Validate the hash
$ echo "d62de2400eeeacd195db91e2ff011bfb646cd5d85545e81d8f78c436183e09a8  actions-runner-linux-x64-2.316.1.tar.gz" | shasum -a 256 -c
# Extract the installer
$ tar xzf ./actions-runner-linux-x64-2.316.1.tar.gz

# Create the runner and start the configuration experience
$ ./config.sh --url https://github.com/your-org --token your-token
# Last step, run it!
$ ./run.sh
In the ./config.sh step it will ask you to asign your runner a label. You should chose one as a runner name so you can call to the runner latter in the gihub actions yaml file. Then if you running using ./run.sh just ctrl c to stop it because now we’ll config it to run in the background using system V
After run the config.sh file now you will get svc.sh file in same folder. First setup the service by (you need run these commands as super user)
sudo ./svc.sh installEnable the service so it will be start when system restart
sudo ./svc.sh enableStart/stop/check status the service
sudo ./svc.sh start
sudo ./svc.sh status
sudo ./svc.sh stop
if you want to uninstall the service
sudo ./svc.sh stop
sudo ./svc.sh uninstall
If everything works fine you can see you runner is online at github page like this

How to use
For each repo go to the actions and chose create actions follow my self then in the yaml file you can code your actions scripts here is an example
name: ci

on:
  push:
    branches: master

jobs:
  taipy-runtime-be:
    runs-on: Cryptopiece
    steps:
      - name: Checkout
        uses: actions/checkout@v3
      - run: |
          commit_hash=$(git rev-parse --short $GITHUB_SHA)

          docker build -t docker.fcs.ninja/taipy-runtime-be:$commit_hash .
          docker push docker.fcs.ninja/taipy-runtime-be:$commit_hash

          kubectl set image deployment/taipy-runtime-be taipy-runtime-be=docker.fcs.ninja/taipy-runtime-be:$commit_hash -n taipy-runtime-be
We build an image from source code (which contains the Dockerfile file) then tag it as the current commit hashh then we push the image to the private registry and update the image in the deployment.To do it your VM which run github runner need to install docker (in rootless mode: https://docs.docker.com/engine/security/rootless/ because github runner will not run as super user and log in the docker to your private registry also it need to install kubectl and point context to your cluster docker).
Conclusion
Quite easy right ? Now every time you or the dev team push code to git all things will be auto deploy :v at this point devops-er is very free :v we don’t need to do much things when every setup is running well. But the devops’s works are not only setup and deploy services we need to monitoring and debugging when services have problems as well. So in next blog of this series let’s discorver a new tool for monitoring manage and debugging with lens and open observe Part 12: Monitoring and debugging with Open Observe and lens
Thanks for reading and see you soon in these final parts of this blog series
__CodingCat__