Develop an api at localhost:3000. Now you want anyone can use your api ? Let’s see how can we deploy a backend api to aws cloud service with the easiest way
Table contents
- Part 1: My first time deploy a web to a aws cloud service
- Part 2: Docker and containerization
- Part 3: K8s and the new world of container orchestration
- Part 4: Deploy your express application to k8s
- Part 5: Networking with K8s is f***ing hard
- Part 6: From the cloud to ground: Physical server setup for a private cloud
- Part 7: From the cloud to ground: Install Ubuntu Server and Microk8s
- Part 8: From the cloud to ground: Harvester HCI for real world projects
- Part 9: From the cloud to ground: Private images registry for our private cloud
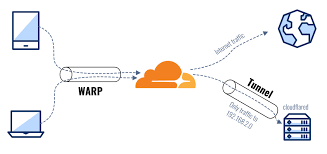
- Part 10: From the cloud to ground: Accept outside world traffics via Cloudflare tunnel
- Part 11: From the cloud to ground: CI/CD with git hub runners
- Part 12: Monitoring and debugging with Open Observe and lens
1. Get a Lightsail
For hosting a backend service you need a VM (usually a linux machine). AWS has a lot of tools to do that you can choose EC2. But the most simple way is lightsail, it bundles anything for you just some clicks and you have an up and running server.
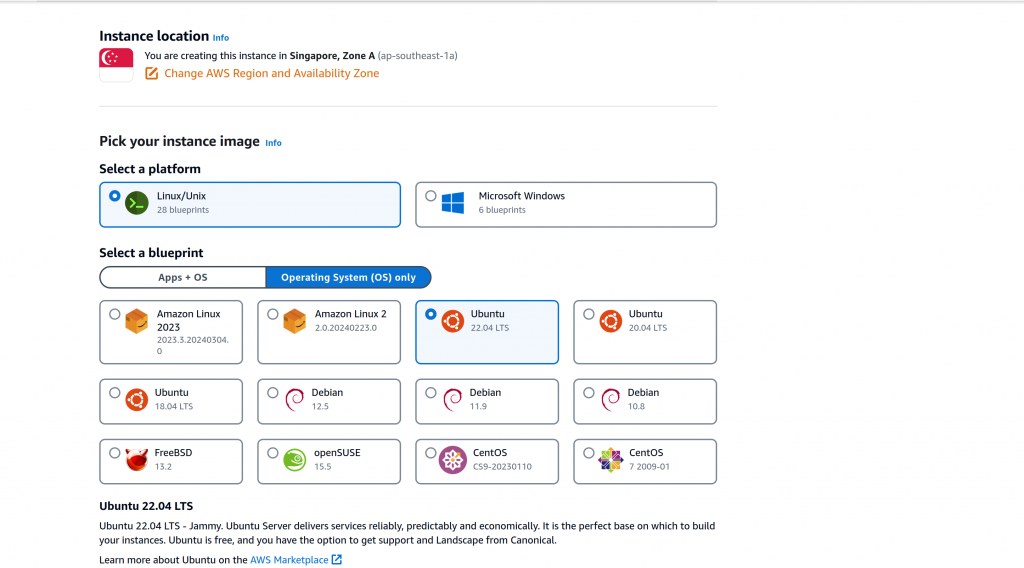
- Go to https://lightsail.aws.amazon.com/ls/webapp and create a lightsail instance. Choose your region, your OS (here i choose Ubuntu). Choose bundle sizes that satisfy your needs (ram, cpu, ssd). Also your VM name and click “Create”
- Now when AWS setup for you click the terminal button to start ssh to your server.
- First you need to config ssh so you can ssh from your local machine’s terminal to root account. We don’t use ssh web browser method cause it’s supper lag and slow. Here is how you can do it
sudo su
vim /etc/ssh/sshd_config
# find #PermitRootLogin prohibit-password and change to
# PermitRootLogin yes
# then find PasswordAuthentication set this key to yes: PasswordAuthentication yes- Save the file then
sudo systemctl restart ssh - Also you need to set a password for root user using this command:
sudo passwd root - Now open your terminal then type:
ssh root@<ip>to ssh to your VM. And start building things - Bonus tips: On linux machine you can use: ssh-copy-id command for save the password then you don’t need to enter password each time you need to ssh to a server:
ssh-copy-id root@<your-server-ip>
2. Install your environments
Based on your application you can install the environments you need for example: nodejs, mysql, java,… Just google something like “install nodejs on ubuntu” then follow these steps. Installing things on Linux is super easy, not complicated as on Windows. Most of time you just type sudo apt install :))))
3. Pull your code and Run your app as a service
- Install git and pull your project code to VM using ssh method (ssh-keygen get the public ssh key and go to github settings > ssh/gcp key then add the key).
- To run your app as a service there are few options using systemctl (systemV),… But the easy way is use screen or pm2
- Install pm2 via npm:
npm i -g pm2 - Setup a start point for pm2 for example:
echo npm run dev > server.sh - Set this file executable:
sudo chmod + server.sh - Then start pm2:
pm2 start server.sh - Now you have a web server running even you close the ssh terminal it still running :v
- Read more about pm2 here: https://pm2.keymetrics.io/
4. Config network and get Free SSL via Cloudflare
- At this point if you go to <vm-ip>:<application-port> you may not see your application. It’s because by default lightsail does not allow any custom tcp port to go to the VM. you need to open your application port. Go to Lightsail dashboard, select your instance, navigate to tab network click add rules and type the port you want to open with method is tcp/http then click add. Visit <vm-ip>:<application-port> again
- But at this point your api does not have ssl certificate yet that means FE can not call it if it is deployed and running on a site with SSL certificate.
- To get SSL for your VM you can use certbot for free SSL but the most efficient way is to use cloudflare sites. Purchase you a domain. Login to cloudflare click add sites. Enter your domain -> choose a free plan -> then setup NS of your domain as cloudflare tells you to do. So cloudflare can manage your domains
- Now go to your site in cloudflare dashboard navigate to DNS tab add an A record with type is @ and value is your VM ip. Now your domain will point to your VM
- But it will point to port 80. Let’s say your backend is running at port 3000. You have 2 options: configure your backend to run at port 80 or use nginx to reverse proxy. this way you can have multi application running on same VM each applications running on a port and can be access from different domains
- Nginx reverse proxy is a super useful tool that you should use not because you can host many applications in one VM but also you can have a load balance layer before a request comes to your backend server. Also using cloudflare proxy ssl will hind your VM IP. we don’t want to reveal our VM IP of course :v
- Here is a simple nginx proxy setup
- Install nginx:
sudo apt install nginx - Start nginx:
sudo systemctl start nginx
Setup reverse proxy by add a config in /etc/nginx/sites-enabled/: vim /etc/nginx/sites-enabled/
server {
    listen 80; # alaways listen to 80 cause we point DNS record to ip:80
    server_name myapp.mydomain.com; # change it to your domainname

    location / {
        proxy_pass http://localhost:3000; # change it to your application port
    }

}
- Save the file then:
sudo systemctl restart nginx - Now visit your domain you should see your application up and running with https method
That’s how I usually set up a backend server running on aws lightsail. For the simple i not going detail on for example linux command, install things, nginx etc… You can read more about this but with lightsail and cloudflare things get very simple to deploy a fast and secure backend service. That’s it but if you’re doing only these things you can not call yourself a devops :))) so let’s see what a noob devops needs to know in the next series: Part 2: Docker and containerization. Thanks for reading <3
__Coding Cat__